Latte art transforms a simple cup of coffee into a canvas of creativity.
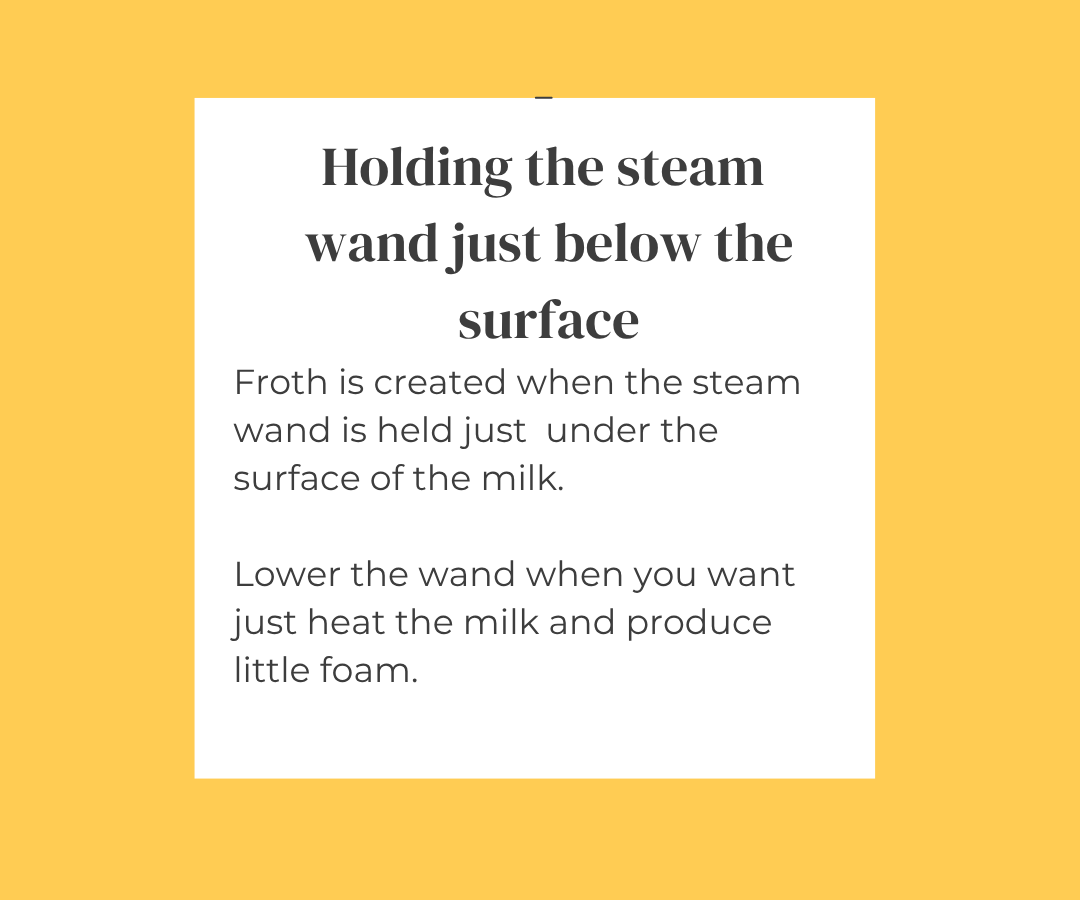
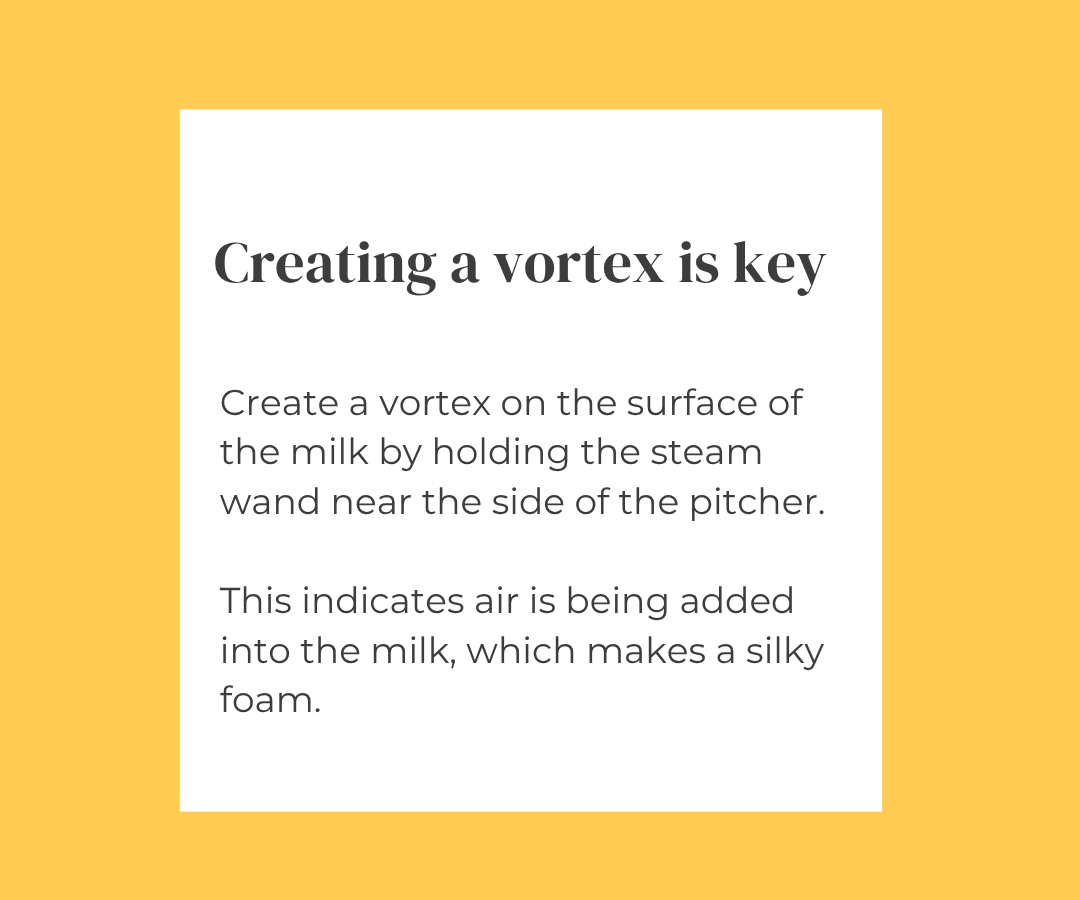
A thick and velvety crema on a good espresso can make or break your coffee experience. This frothed crema is used to create the iconic finish on cappuccinos and the swirls of latte art. To create perfect steamed froth, milk is poured into a steaming pitcher then both heated and frothed simultaneously. Frothed milk is created when the steam wand is used to rapidly fold air into the milk, and create that silky smooth texture of micro bubbles. This is different than say a head on a pint of lager, as the foam just sits atop of the beer. Froth is different because, milk is mixed with the bubbles to create a thick silky mixture that doesn’t separate immediately. If the wand is not exposed at all no air is introduced, simply heating the milk and creating steamed milk.
Latte art transforms a simple cup of coffee into a canvas of creativity, blending the rich flavors of espresso with the delicate textures of steamed milk to craft visually stunning designs. Whether you're a budding barista or a coffee enthusiast eager to enhance your home brewing skills, mastering latte art is a rewarding endeavor. This guide will walk you through essential techniques, beginner-friendly designs, milk selection, pitcher handling, and provide step-by-step instructions accompanied by professional tips to elevate your latte art game.

Understanding Latte Art
Latte art involves pouring steamed milk into a shot of espresso in a manner that creates intricate patterns or designs on the surface. Achieving this requires precision, practice, and an understanding of the interplay between espresso and milk.
Essential Techniques for Latte Art
Espresso Preparation: Begin with a well-extracted espresso shot. The crema, the golden-brown layer atop the espresso—serves as the backdrop for your art. A rich, thick crema is crucial for contrast and clarity in your designs.
Milk Steaming: Steaming milk to the right texture is pivotal. Aim for microfoam, milk steamed to a velvety consistency with tiny, uniform bubbles. This texture allows the milk to blend seamlessly with the espresso, enabling smooth pours and detailed designs.
Choosing the Right Milk
Does milk type matter? It does change the crema texture, influencing how long lasting or easy to pour the foam is. High fat milk yields a creamier and richer flavor due to the fat content. Low fat milk types like skim will create a very stiff and longer lasting froth. These also yield a less rich flavor experience.
Whole milk is often preferred for latte art due to its higher fat content, which contributes to a creamier texture and stable microfoam. However, alternatives like oat milk and soy milk can also produce satisfactory results when steamed correctly. tI also produces more of a wet velvety froth that is much easier to pour into latte art. The key is to use fresh, cold milk, as it steams more effectively and yields better microfoam.
Embarking on the journey of latte art is both challenging and fulfilling. With dedication, patience, and a passion for coffee, you'll soon transform your daily brew into a masterpiece that delights both the eyes and the palate
Step-by-Step Guide to Crafting Latte Art
Tips on Holding and Handling the Pitcher
Proper pitcher handling influences the control and precision of your pour:
Grip: Hold the handle of the pitcher with your dominant hand, ensuring a firm yet comfortable grip.
Support: Use your other hand to steady the base of the pitcher, providing additional control during the pour.
Angle: Tilt the cup slightly towards the pitcher. This angle facilitates the milk flowing beneath the crema initially, then rising to create the design as you adjust the pour.
For a visual demonstration of these techniques, consider watching this tutorial:
By following these steps and dedicating time to practice, you'll be well on your way to mastering the art of steaming milk and creating beautiful latte art designs.
Beginner-Friendly Latte Art Designs
Starting with simple patterns builds confidence and hones pouring skills. Here are two designs ideal for beginners: practicing latte art
The Heart:
Pouring: Begin by pouring steamed milk into the center of the espresso, holding the pitcher high to allow the milk to penetrate the crema.
Forming the Base: As the cup fills, lower the pitcher and increase the flow slightly, allowing a white circle to form.
Creating the Heart: Once the circle is prominent, lift the pitcher slightly and draw a straight line through the center, from top to bottom, to shape the heart.
The Rosetta:
Initial Pour: Pour milk into the center to create a base, similar to the heart.
Creating Leaves: Gently wiggle the pitcher spout side to side while moving it backward, allowing layers to form resembling leaves.
Finishing: Once you reach the cup's edge, lift the pitcher and pour a thin stream through the center to define the stem.
Pro Tips for Aspiring Latte Artists
Consistent Practice: Regular practice refines your technique and builds muscle memory, essential for fluid motions and precision.
Milk Selection: While whole milk is traditional, experimenting with different milk types can yield varying textures and flavors, enhancing both the art and taste of your latte.
Pitcher Quality: Invest in a good-quality stainless steel pitcher with a pronounced spout, as it offers better control during pours.
Temperature Awareness: Avoid overheating the milk; excessively hot milk loses its sweetness and can scorch, affecting both flavor and texture.
Seek Feedback: Share your creations with fellow enthusiasts or mentors to gain constructive insights and identify areas for improvement.
Embarking on the journey of latte art is both challenging and fulfilling. With dedication, patience, and a passion for coffee, you'll soon transform your daily brew into a masterpiece that delights both the eyes and the palate.
_____
Need a new steaming pitcher?
Shop below to see our selection of professional grade barista equipment.


